Recording acoustic guitar is difficult! So how can you create a lush and wide acoustic guitar sound that will amaze your audience? And what if you have only one microphone? How to record an acoustic guitar with one mic in stereo? Let’s get creative!

The free tutorials and articles from Learning
Acoustic guitars are notoriously difficult to record and to make an acoustic guitar recording sound good. Recording an acoustic guitar at home can be a challenge because often you need to do everything by yourself. I mean who has not struggled with how to record yourself playing acoustic guitar? Do you have the same problem when recording guitar? Well, then join the club!
Let’s find out how to mic an acoustic guitar for recording at home.
Why Acoustic Guitar Is Hard To Record
But why is acoustic guitar so hard to record?
- The acoustic guitar is a very dynamic instrument
- Like many acoustic instruments, the acoustic guitar has complex pattern frequencies
- The mic position can differ from guitar to guitar
- Your guitar recording can easily sound too boomy or bass-heavy
- You need good room acoustics for recording
- The acoustic guitar can make many squeaky noises while recording
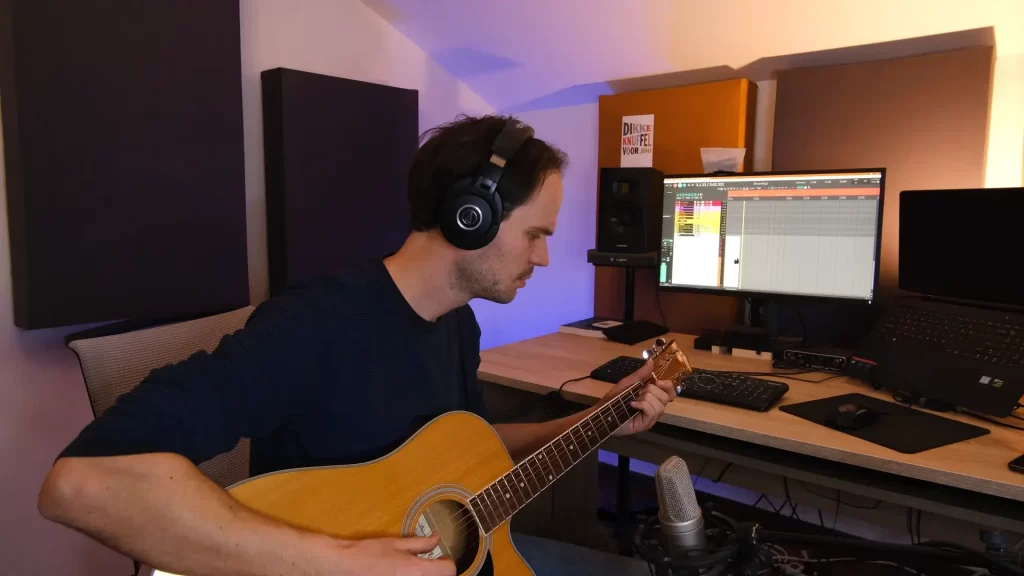
When you only have one condenser mic for recording guitar like the Rode-NT2a, then you would think that you can only record your guitar in mono. But that’s not true. You can create a ‘false’ stereo effect by recording your guitar multiple times in multiple different mic positions. So who says recording in stereo with one mic is not possible?
Video Tutorial: How To Record Acoustic Guitars In Stereo, Even If You Have Only 1 Mic
If you want to see all the recording techniques and recording tips for how to record acoustic guitar with one mic, then check out my tutorial on YouTube. Here I show all the things that you need to keep in mind when making a home recording in a room or bedroom with bad room reverb. Or when you are recording your acoustic guitar in stereo with only one mic. For more tutorials on

If you want to read the video transcript see below at the end of this article.
The Best Microphones For Recording Acoustic Guitar
When you want to record your acoustic guitar, then preferably you want to have a pair of small diaphragm condenser microphones. For example these AKG P 170 small diaphragm condensers. They are not that expensive and I really think that these AKG P170 are the best budget acoustic guitar mic. And they perform great.


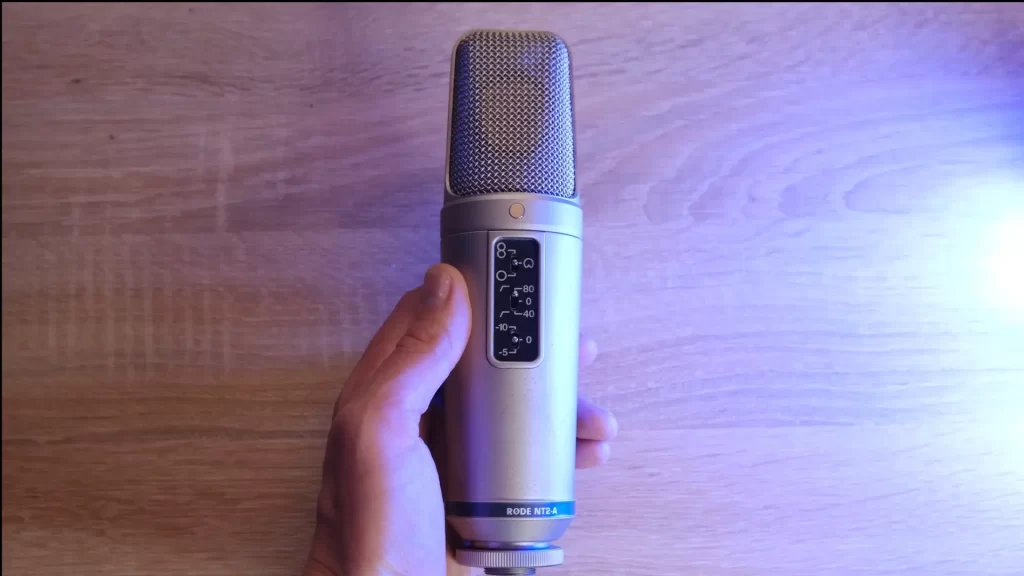
But what if you want to start recording acoustic guitars with a condenser mic, but you don’t have a stereo pair? In that case, any large diaphragm condenser mic will do. My personal favourite large diaphragm condenser mic for recording guitar is the Rode NT2-A. I originally bought it as a vocal mic, but it is also very suitable for recording your acoustic guitar.
Create A Stereo Guitar Effect With One Mic
So how to record acoustic guitar with one mic in stereo? Well, we will need to cheat a little bit. because as you now know, a true stereo recording will not be possible with only one Rode NT2-A or whatever mic you have at home.
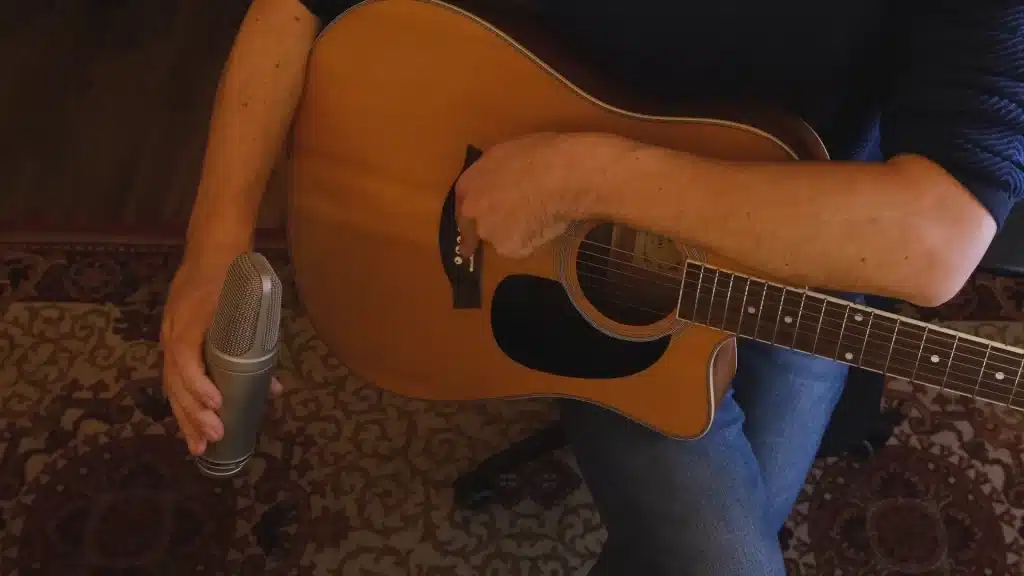
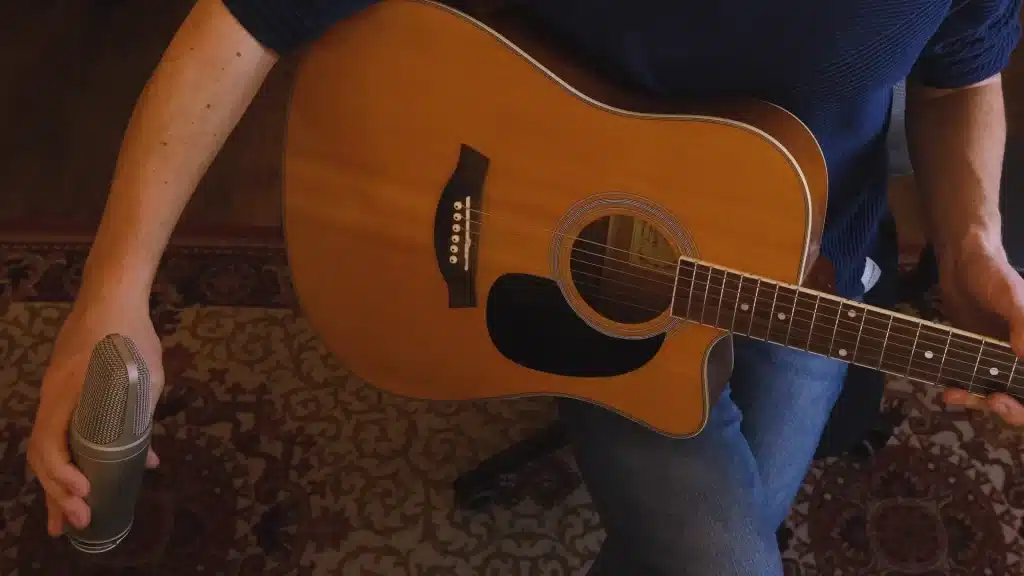
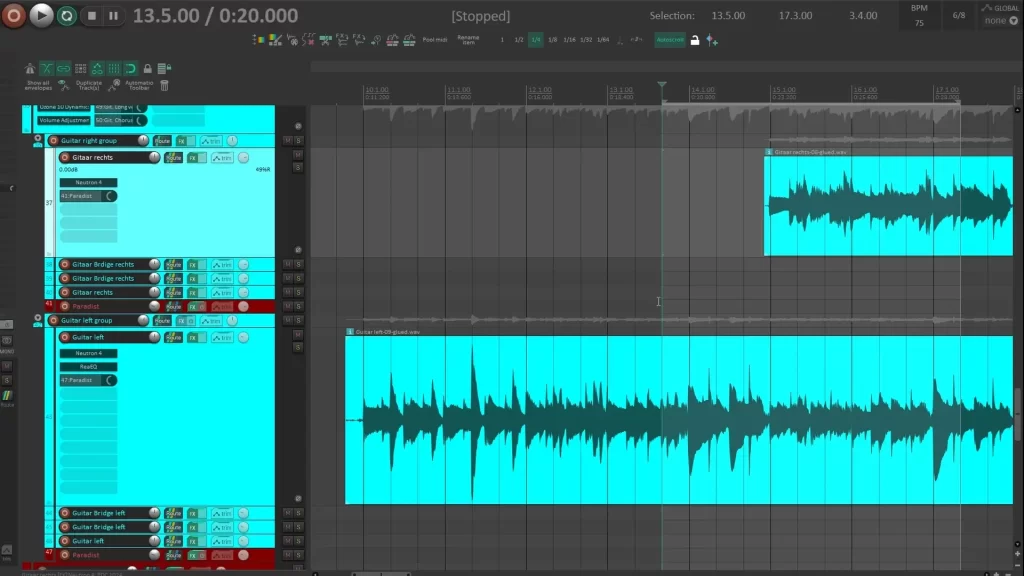
What you need to do is perform your acoustic guitar part twice and record it twice. But when you record your guitar, you will use a different mic position for each part. What that means, is that you will have two separate guitar tracks that were played and recorded separately in different positions. Below I will show you how to mic an acoustic guitar so that you can apply this technique.
In this case, I want to record a brighter sound and a warmer and fuller sound. And during mixing, I will pan these two tracks left and right, and also use different EQ on them.
The Importance Of Room Acoustics
Before you start recording please read this! I cannot emphasize enough how important the room is in which you record your

If you cannot make any acoustic panels by yourself and you don’t have money to buy some. Then I advise you to improvise a bit. Here are some tips for getting a cleaner recording in your bedroom or recording room:
- Record in front of thick curtains
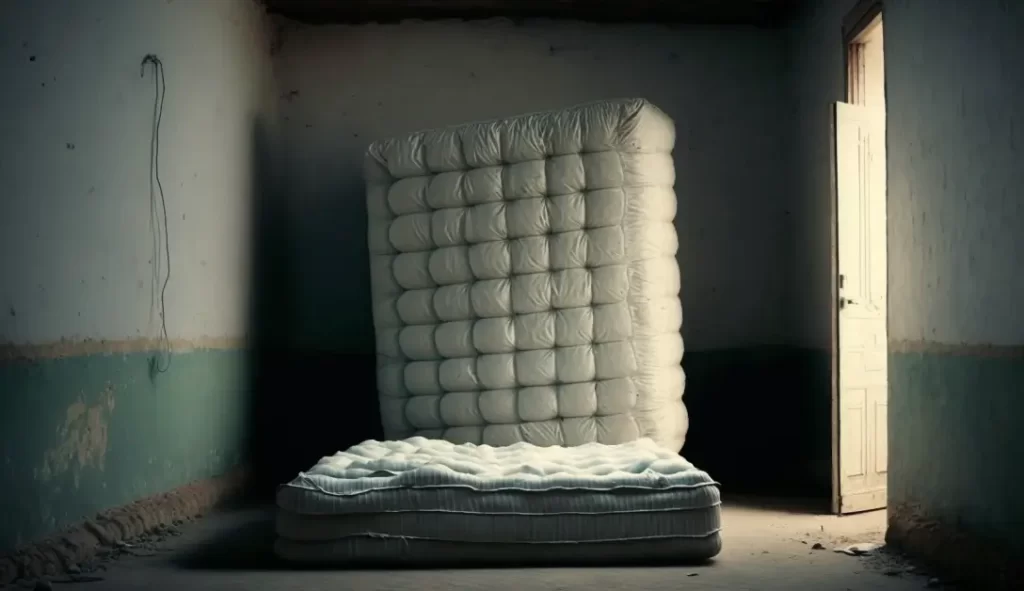
- Put up a mattress against the wall
- record in front of a full wardrobe closet.


Home Recording: How Not to Record Your Guitar In Your Room
What should you avoid when you record your acoustic guitar?
- Don’t record close to a wall
- Don’t record close to any other reflecting surfaces
- Don’t put the mic in front of the sound hole.
- Limit any other noisy sound sources
The lucky thing is when you have a condenser mic, that it has a cardioid pickup pattern, this pattern is less sensitive to sounds coming back the back side of the mic. So if you have an untreated wall or annoying sound source that you cannot block, then point the back of the mic to the wall or noise source.


Microphone Technique for Recording a Bright Acoustic Guitar Sound
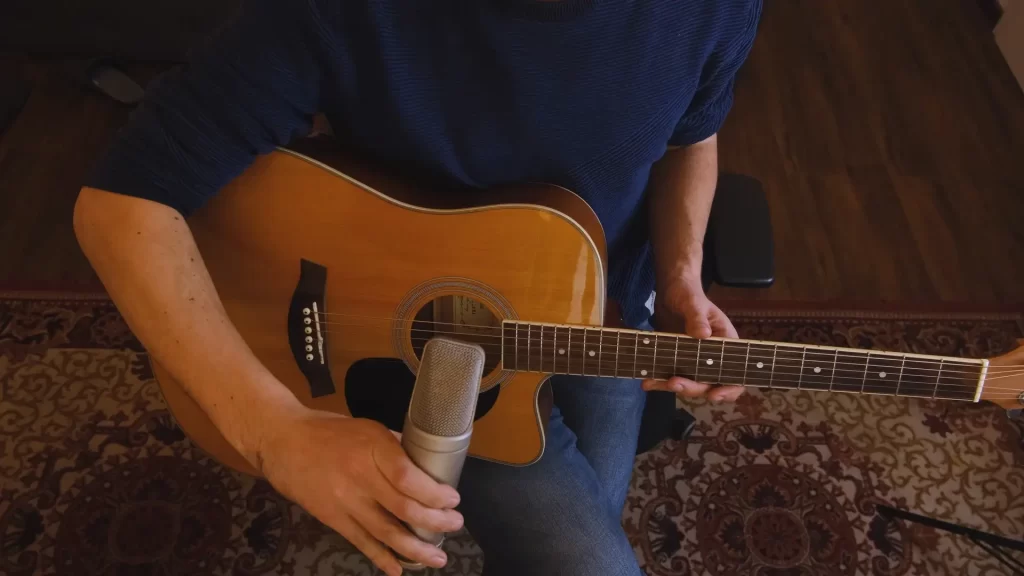
When you want to record a bright acoustic guitar track, then with your microphone technique you want to focus on the neck area of the guitar. Especially around the 12th fret. Just keep in mind that you keep the microphone off-axis to the sound hole. Otherwise, it will sound boomy. The closer you get to the guitar, the more you will zoom in on a certain sound area. When you do this too much, the guitar might sound too thin and strange.


Recording Warm Acoustic Guitar Sounds
Now for our second acoustic guitar track, I want some fuller and warmer guitar sounds. I am going to focus my mic position on the bridge. This will result in a warmer and more muffled sound. And remember, if you put the microphone a little bit further away, then you get a more complete and true sound picture of your guitar.
How to EQ and Pan Your Acoustic Guitar Recording
After you edit your guitar recordings and have chosen the best takes, it is time to start mixing the guitar. To create a stereo picture, you want to pan the guitar tracks apart. So one guitar track to the left and the other one to the right. You can hard pan them, which means 100%, or do it more subtly around 50% or so.

This panning of the guitars will create a stereo spread and separation between the two acoustic guitar tracks. Now with your EQ you can emphasize the differences between both acoustic guitar tracks. You can add a high shelf or a low pass filter to your warmer guitar track. And you can add a high pass or low shelf to your brighter guitar track.

An Acoustic Guitar Recording Example
If you have limited gear and no personal assistant probably, like me, you struggle with the situation of how to record yourself playing acoustic guitar. And also how to get an amazing sound doing it. I could not do a regular stereo setup at the time. So I had to be creative while recording guitar in stereo with only one mic.
For my
Here I used the technique to make my arrangement and introduction more interesting. The track starts with a brighter and thinner acoustic guitar recording. Later when the warmer guitar recording comes in the stereo picture is complete and the full warm sound of the song is set.
You can listen to the final results below.
Summertime by Facing Mountains
Why Is A Condenser Mic The Best Acoustic Guitar Mic?
When it comes to how to record guitar in stereo, condenser microphones are the best choice for recording acoustic guitar. They are more sensitive and can capture higher frequencies. Everything sounds much clearer.
The sound recorded by a condenser microphone, especially when it is used to record an acoustic guitar, is accurate, detailed and transparent. As you know the acoustic guitar can be a very tricky instrument to record. So the key is to buy not just the most expensive microphone, but the most suitable for your budget and needs. Not all microphones are born the same, and the acoustic guitar has some unique and very special sonic characteristics that respond better to some mics than others.
Condenser microphones have a wide frequency response that can easily capture an acoustic’s frequency range.
Your Support Matters
Support new videos by becoming a member and receive benefits in return. Or by giving a one-time donation! Help me provide free
https://www.buymeacoffee.com/musicskills


Conclusion
So hopefully now you see and can hear that it is not necessary to have many fancy and expensive microphones for recording a great acoustic guitar track at your home studio or in your bedroom. So the best acoustic guitar mic can be a relatively cheap one! And you can even create a stereo effect when you know how to record acoustic guitar with one mic by recording the same guitar part, but from multiple microphone angles.
Here is a recap of why is it difficult to record acoustic guitars and how can you manage them:
- Room Acoustics: The acoustic properties of the room where you’re recording your guitar can really affect the sound. Rooms with hard surfaces create many echoes and unwanted reverb that gets picked up by the microphone. This will make your recording muddy and awkward sounding. Solution: Acoustic panels, thick curtains, mattresses or anything that absorbs sound.
- Microphone Placement: Finding the right spot to place the microphone is crucial. If the microphone is too close to the guitar, you will hear too many finger noises and fret sounds also, you zoom in on a small part of the acoustic picture. If it’s too far, you might lose the warmth and detail of the guitar’s sound. Solution: think about what your goal is. Need detail? Record closer. Need a more complete sound? Place the mic a bit further. Just remember: Never place the mic in front of the sound hole!
- External Noise & Handling Movement: Condensor microphones are sensitive and pick up background noises like footsteps, doors creaking, street noises or other people talking. But also any movement of the musician and other unwanted noises will be recorded. Solution: Record during the early or late hours of the day when there is less outside activity. Wear clothes that don’t make noise and remove any jewellery.
- Recording/gain Level: Acoustic guitars have a wide dynamic range – This means they can go from quiet to loud very abruptly. If the recording level is set too high, the loud parts will distort or clip. But if it’s set too low, the quiet parts might get lost in the background noise.
- Microphone Type: Different microphones have different characteristics. Some might capture more of the high frequencies (treble), while others might emphasize the mid or low frequencies. Choosing the right microphone type for the acoustic guitar’s sound is important.
Because of the list above, recording acoustic guitars requires careful consideration. You need to think about factors like room acoustics, microphone choice, placement, and controlling background noise.